JustAPendulum
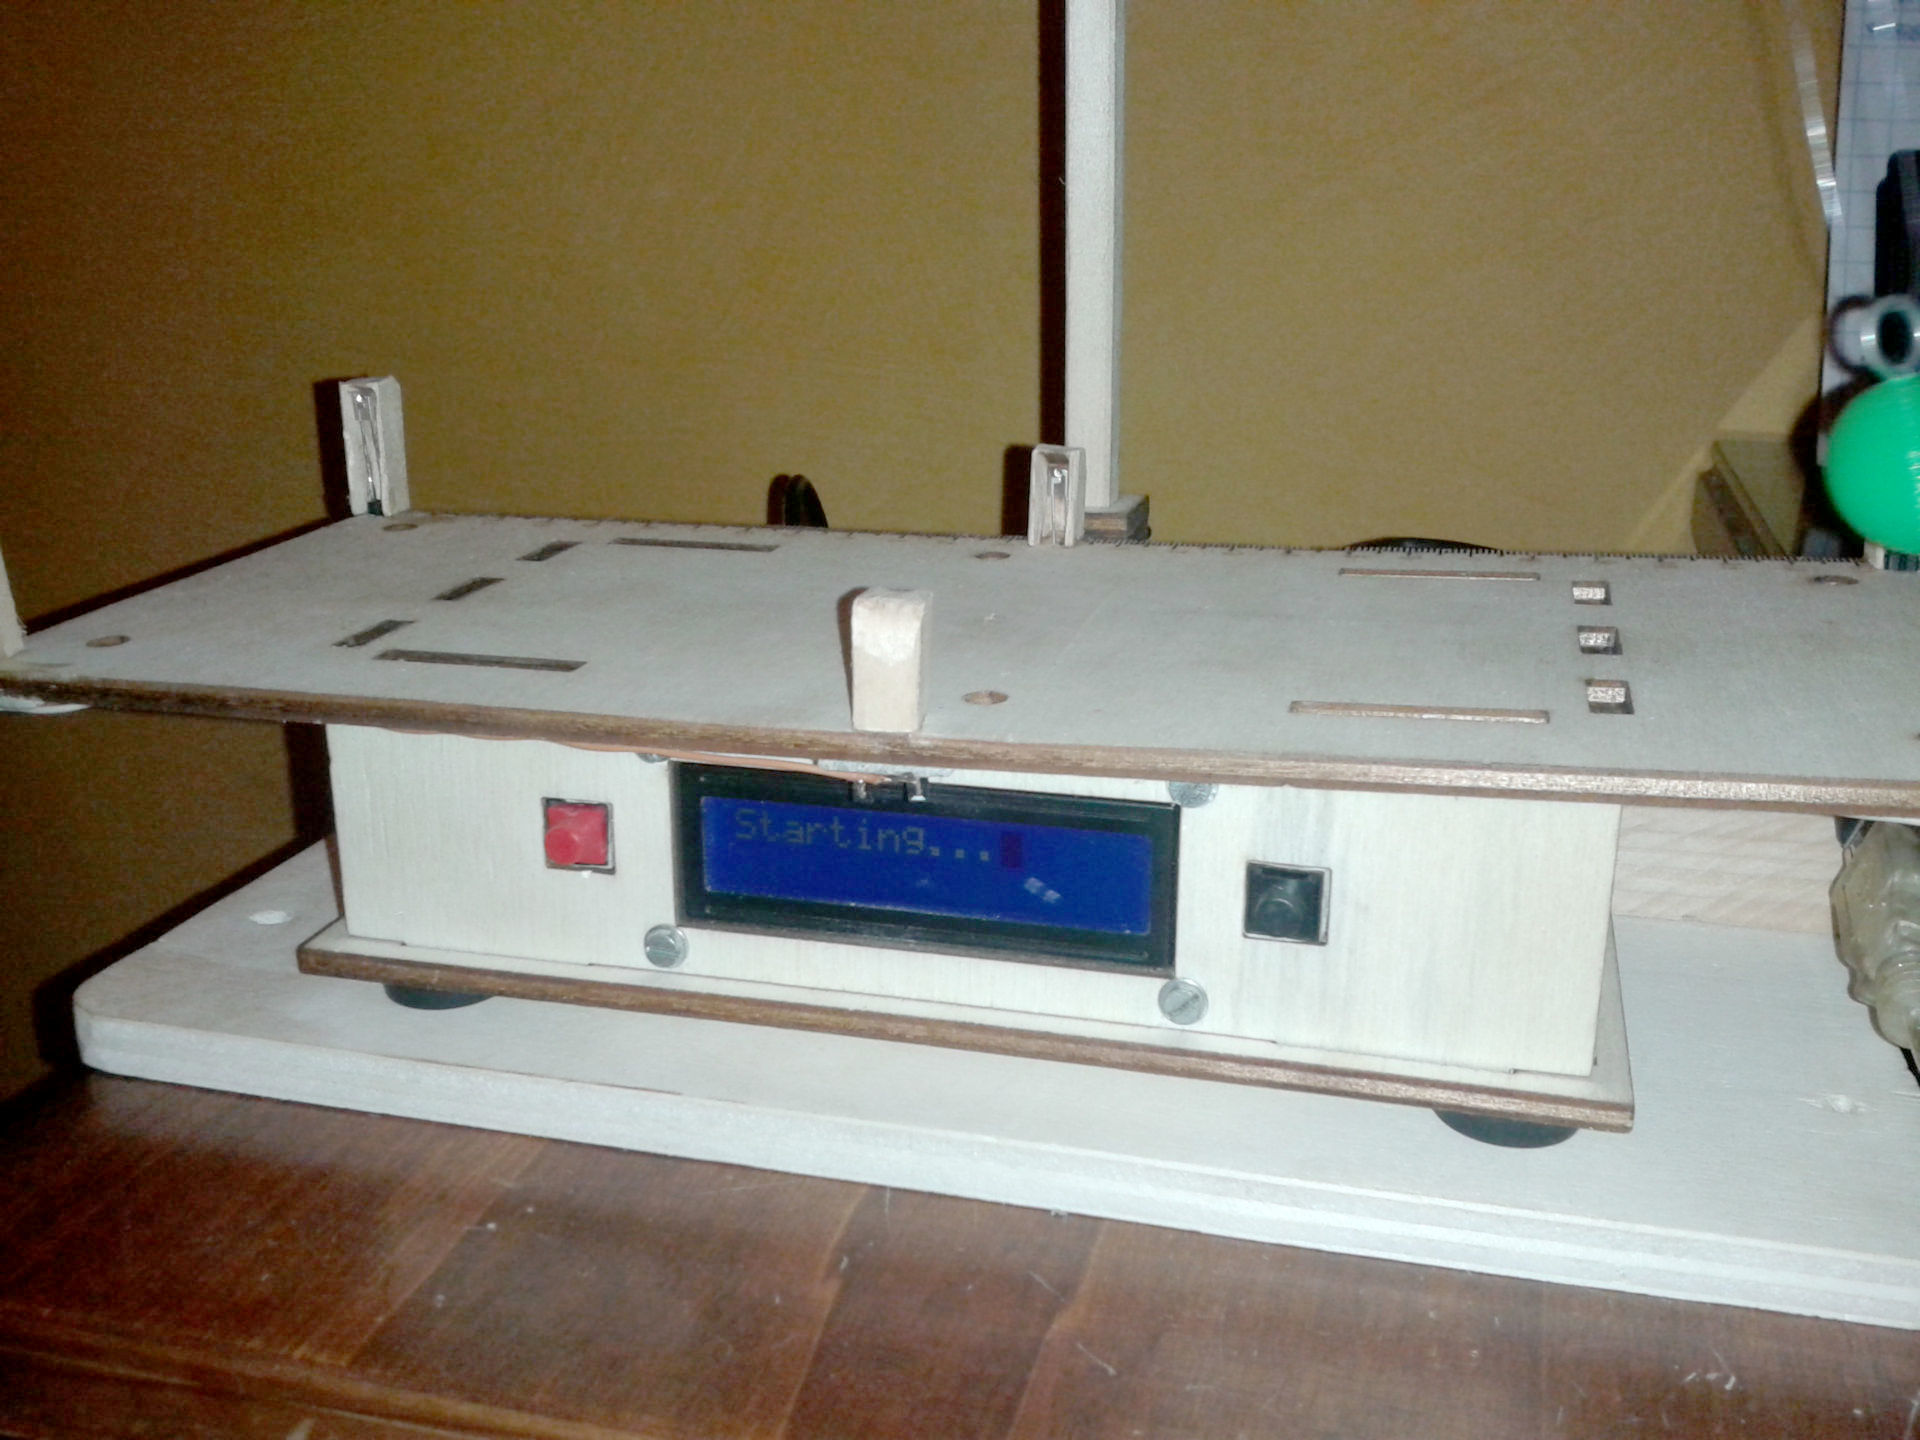
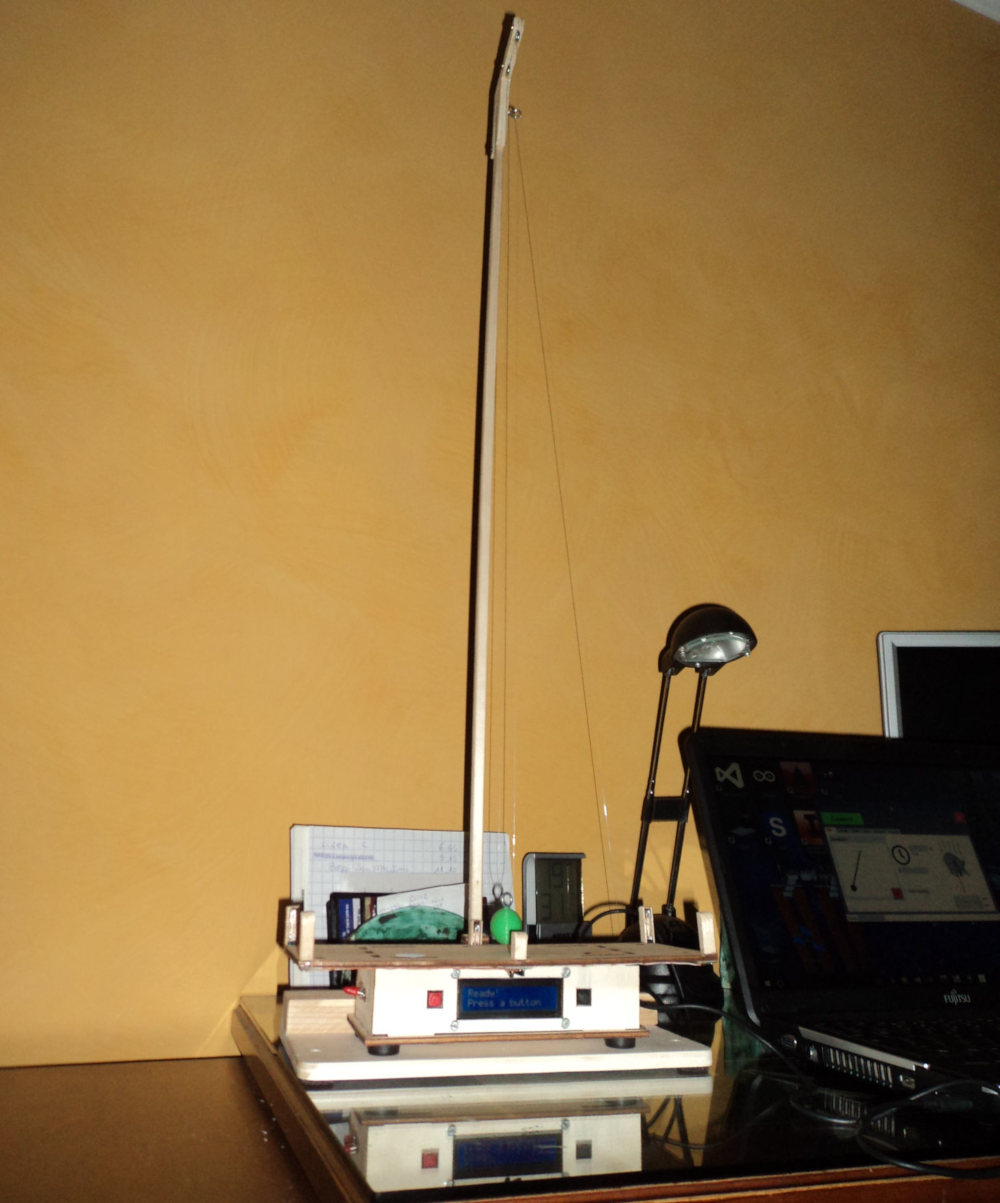
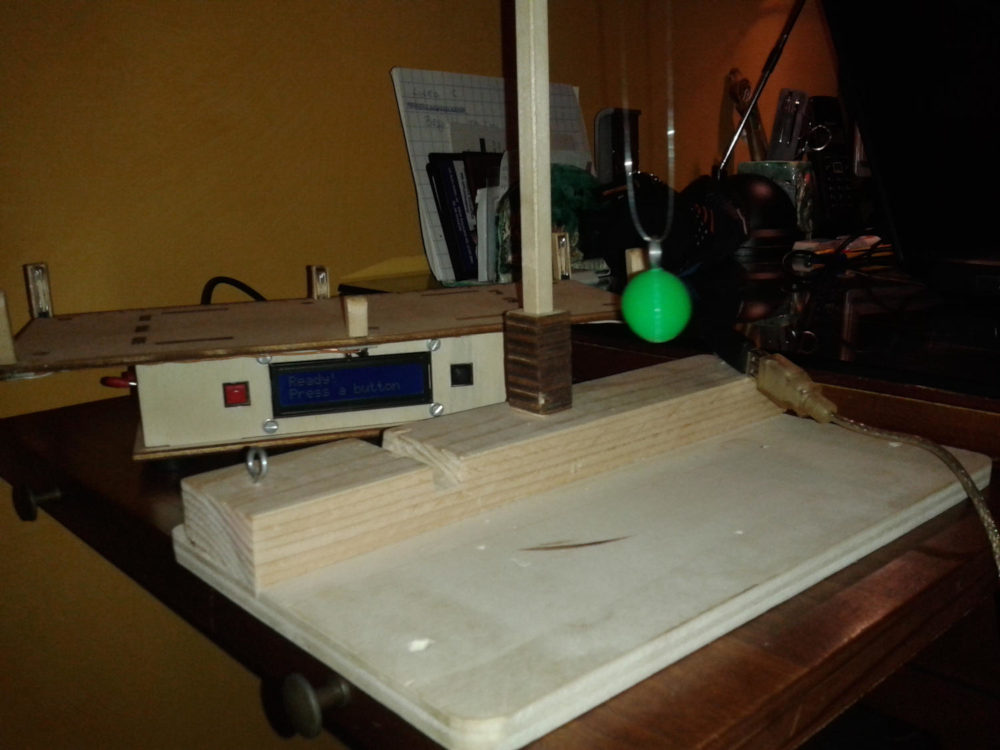
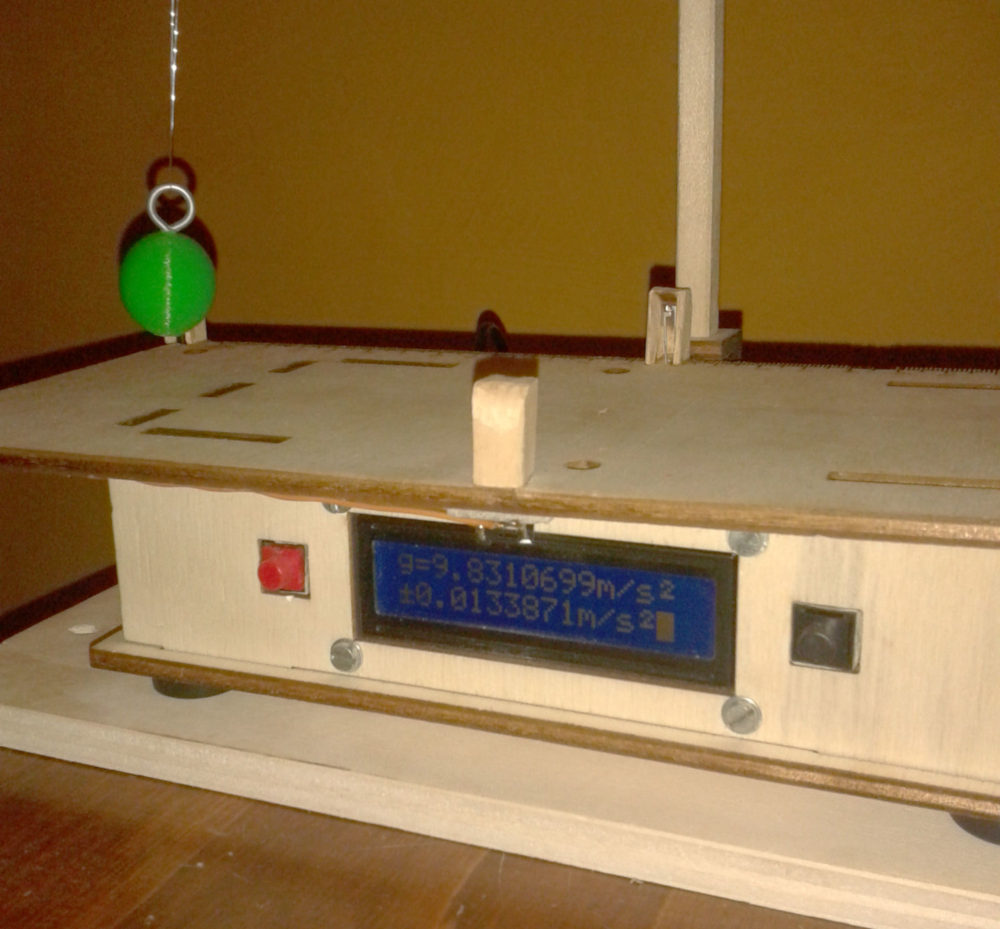
![]() JustAPendulum is an Arduino-based open-source pendulum that measures and calculates the oscillation period to find the gravitational acceleration of the Earth (~9,81 m/s²). It contains a homemade Arduino UNO that uses an USB-to-serial adapter to communicate with your computer. JustAPendulum is highly accurate and has a companion (written in Visual Basic .NET) that, in real-time, will show you the position of the mass and a table and a graph with all the precedent measures. Completely laser cut and homemade, it’s very easy-to-use: just push a button and let the mass fall and the board will calculate everything. Ideal for tests in physics classes!
JustAPendulum is an Arduino-based open-source pendulum that measures and calculates the oscillation period to find the gravitational acceleration of the Earth (~9,81 m/s²). It contains a homemade Arduino UNO that uses an USB-to-serial adapter to communicate with your computer. JustAPendulum is highly accurate and has a companion (written in Visual Basic .NET) that, in real-time, will show you the position of the mass and a table and a graph with all the precedent measures. Completely laser cut and homemade, it’s very easy-to-use: just push a button and let the mass fall and the board will calculate everything. Ideal for tests in physics classes!
The physics behind it
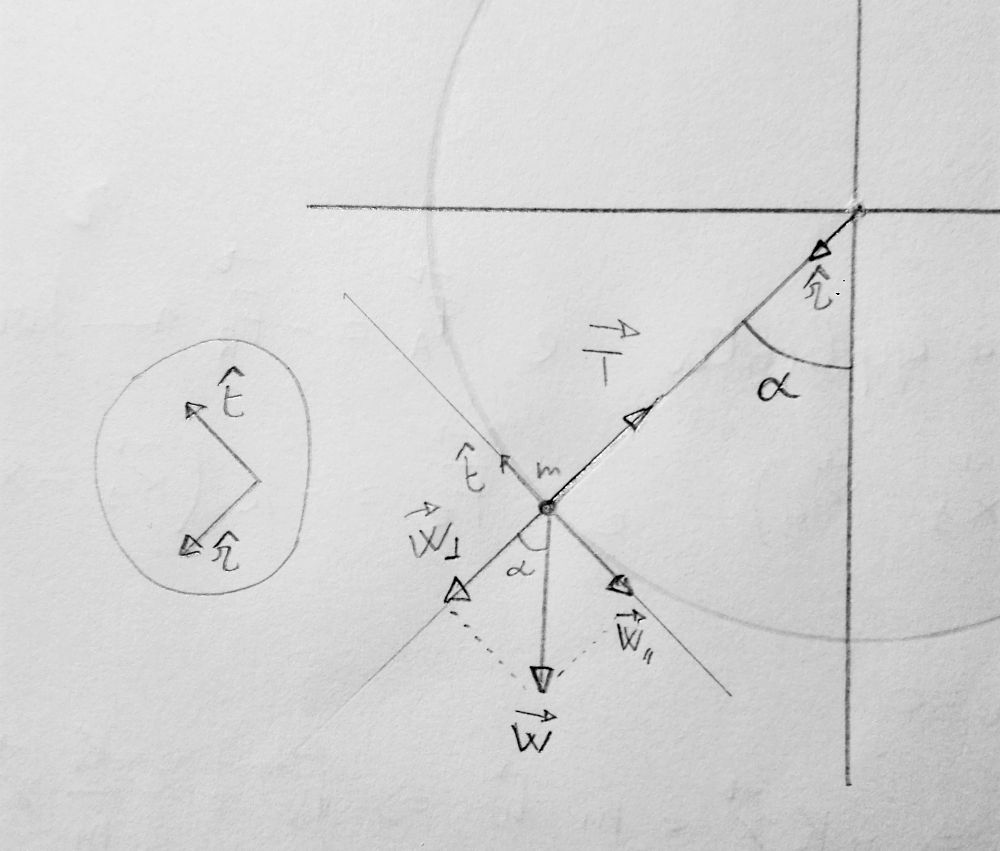
These are all the formulae used in JustAPendulum. I’m not going to demonstrate them, but if you’re curious, this information is easy to find in every physics book. To calculate the gravitational acceleration of the Earth, the pendulum simply measures the oscillation period \(T\), then uses the following formula to calculate \(g\):
\[g=4\pi^2{l \over T^2}\]and this one to calculate the absolute error over the acceleration:
\[e_g=g\biggl({0.01 m \over l}+2{0.001 s \over T}\biggr)\]$l$ is the length of the wire of the pendulum. This parameter must be set from the Companion program (see below). $0.01 m$ is the measurement error of the length (sensibility of the ruler is assumed 1 cm), while $0.001 s$ is the precision of Arduino’s clock.
Galileo Galilei and this formula
This formula was first (partially) discovered by Galileo Galilei around 1602, who investigated on the regular motion of pendulums, making pendulums be adopted as the most precise timekeeping machines until 1930 when quartz oscillators were invented, followed by atomic clocks after World War 2. According to one of Galileo’s students, Galileo was attending a Mass in Pisa when he noticed that wind caused very slight motion of a chandelier suspended in the cathedral. He kept looking at the motion of the chandelier and he noticed that even though the breeze stopped and the back-and-forth distance travelled by the pendulum shortened, yet the time it took the chandelier to make the oscillation seemed to remain constant. He timed the swinging of the chandelier by the regular beating of the pulse in his wrist and realized he was right: no matter the distance travelled, the time it took was always the same. After more measurements and studies, he then found out that
\[T \alpha \sqrt{ L \over g }\]The two times $\pi$, as in the in the previous equation, turns the proportional expression into a true equation - but that involves a mathematical stratagem that Galileo hadn’t got.
Usage
Please note that before using the digital pendulum sensors must be calibrated and wire length adjusted. Put JustAPendulum below a pendulum (minimum 1m tall recommended) and make sure that the mass obscures all the three sensors when oscillating. Sensors work better in low light conditions, so turn off the lights. Switch on the board. A “Ready” screen will appear. Here’s the menu structure:
- Left button: to start the measurements, put the ball to the right and press the button. Arduino automatically detects the ball position and starts.
- “Starting… o.p.: x ms” is displayed
- Left: calculate gravitational acceleration
- Right: back to the main screen
- “Starting… o.p.: x ms” is displayed
- Right button: show configuration
- Right: yes
- Left: no
The companion
JustAPendulum’s companion is a Visual Basic .NET (written in Visual Studio 2015) program that allows the user to monitor the pendulum in real-time from the computer. It displays the last values and errors, has tables and graphs to show the past measures and has tools to calibrate the sensors and to set the length of the wire. History can also be exported to Excel.


Calibrating the sensors
Go the Advanced tab, turn on “ADC monitor” and observe how the displayed values change depending on the position of the ball. Try to find out an acceptable threshold: below it will mean no mass between the detectors, while above it will indicate that the mass is passing between them. If the values don’t change, maybe there’s too much light in the room, so turn off the lamps. Then, press the “Manual calibration” button. Write in the text box the threshold you decided and press enter.
Changing the wire length
To adjust the length of the wire press the “Wire length” button and enter the value. Then set the measurement error: if you measured it with a tape measure the sensitiveness should be 1 mm. All the values will be stored in the memory of the ATmega328P microcontroller.
Gallery
Building it!
Making JustAPendulum yourself is very easy and requires only some low-cost stuff. Refer to this page on how to make it!
Downloads
Companion source code - Visual Studio 2015
Schematic, Autodesk Eagle 9.2.2

This work is licensed under a Creative Commons Attribution-NonCommercial-ShareAlike 4.0 International License.